Recipe: Candied Pecan Waffles

“We need to remember what's important in life: friends, waffles, work. Or waffles, friends, work. Doesn't matter, but work is third.” - Leslie Knope

Candied pecan waffles, give me all of the childhood nostalgia that I love. Growing up in Mississippi, we had huge pecan trees in our front yard. It was so much fun picking pecans and cracking them in my childhood kitchen. Also, candied pecans were an absolute treat to indulge in. On may of our family trips to Louisiana, it was always a blast popping into different shops to pick some up.

Waffles are one of my absolute favorite brunch items to indulge in. When I can’t make it to an actual brunch spot, I’m making some one of my favorite waffle recipes at home. There is nothing better than sleeping in on Sunday morning, and whipping a lovely meal to share with your loved ones.

Today, I’m sharing how I make my candied pecan waffles!

Candied pecan waffles with bacon.

Candied pecan waffles with bacon.

Candied Pecans Recipe

What You’ll Need:

  • 1/2 teaspoon of cinnamon

  • 1 cup of (white) sugar

  • 1 teaspoon of sea salt

  • 1 pound of whole or chopped pecans

  • 1 tablespoon of water

  • 1 egg white

Step 1: Preheat the oven to 250 degrees.

Step 2: Combine sugar, cinnamon, and salt together in a bowl.

Step 3: Whisk egg white and water together in a separate bowl until frothy.

Step 4: Toss pecans in the egg white mixture, and combine sugar mixture into pecan mixture until pecans are evenly coated.

Step 5: Spread coated pecans onto a baking sheet.

Pro Tip: Use parchment paper, this will make sure that the sugar bits don’t stick to the baking sheet, and to the nuts themselves.

Step 6: Place pecans into the preheated oven.

Pro Tip: Stir the pecans every 15 minutes for 1 hour, until pecans are evenly browned, this will ensure that the pecans are evenly coated.

Freshly made candied pecans + waffles.

Freshly made candied pecans + waffles.

Buttermilk Waffles Recipe

What You’ll Need

  • 2 cups of all-purpose flour

  • 2 tablespoons of white sugar

  • 2 teaspoons of baking powder

  • 1 teaspoon of baking soda

  • 1/2 teaspoon of salt

  • 1/4 cup of melted butter

  • 2 cups of buttermilk

  • 2 eggs

  • 1 teaspoon of cinnamon

  • 1 teaspoon of vanilla extract

Step 1: Preheat your waffle iron.

Step 2: Combine all the ingredients above into a large mixing bowl. Stir until the batter is smooth and no longer has any lumps.

Step 3: Slowly pour batter into waffle iron, per iron instructions.

Pro Tip: Add in candied pecans into the batter in the iron, so your waffles can have an extra crunch! Or you can toss in cooked bacon as well - matter of fact you can totally add both!

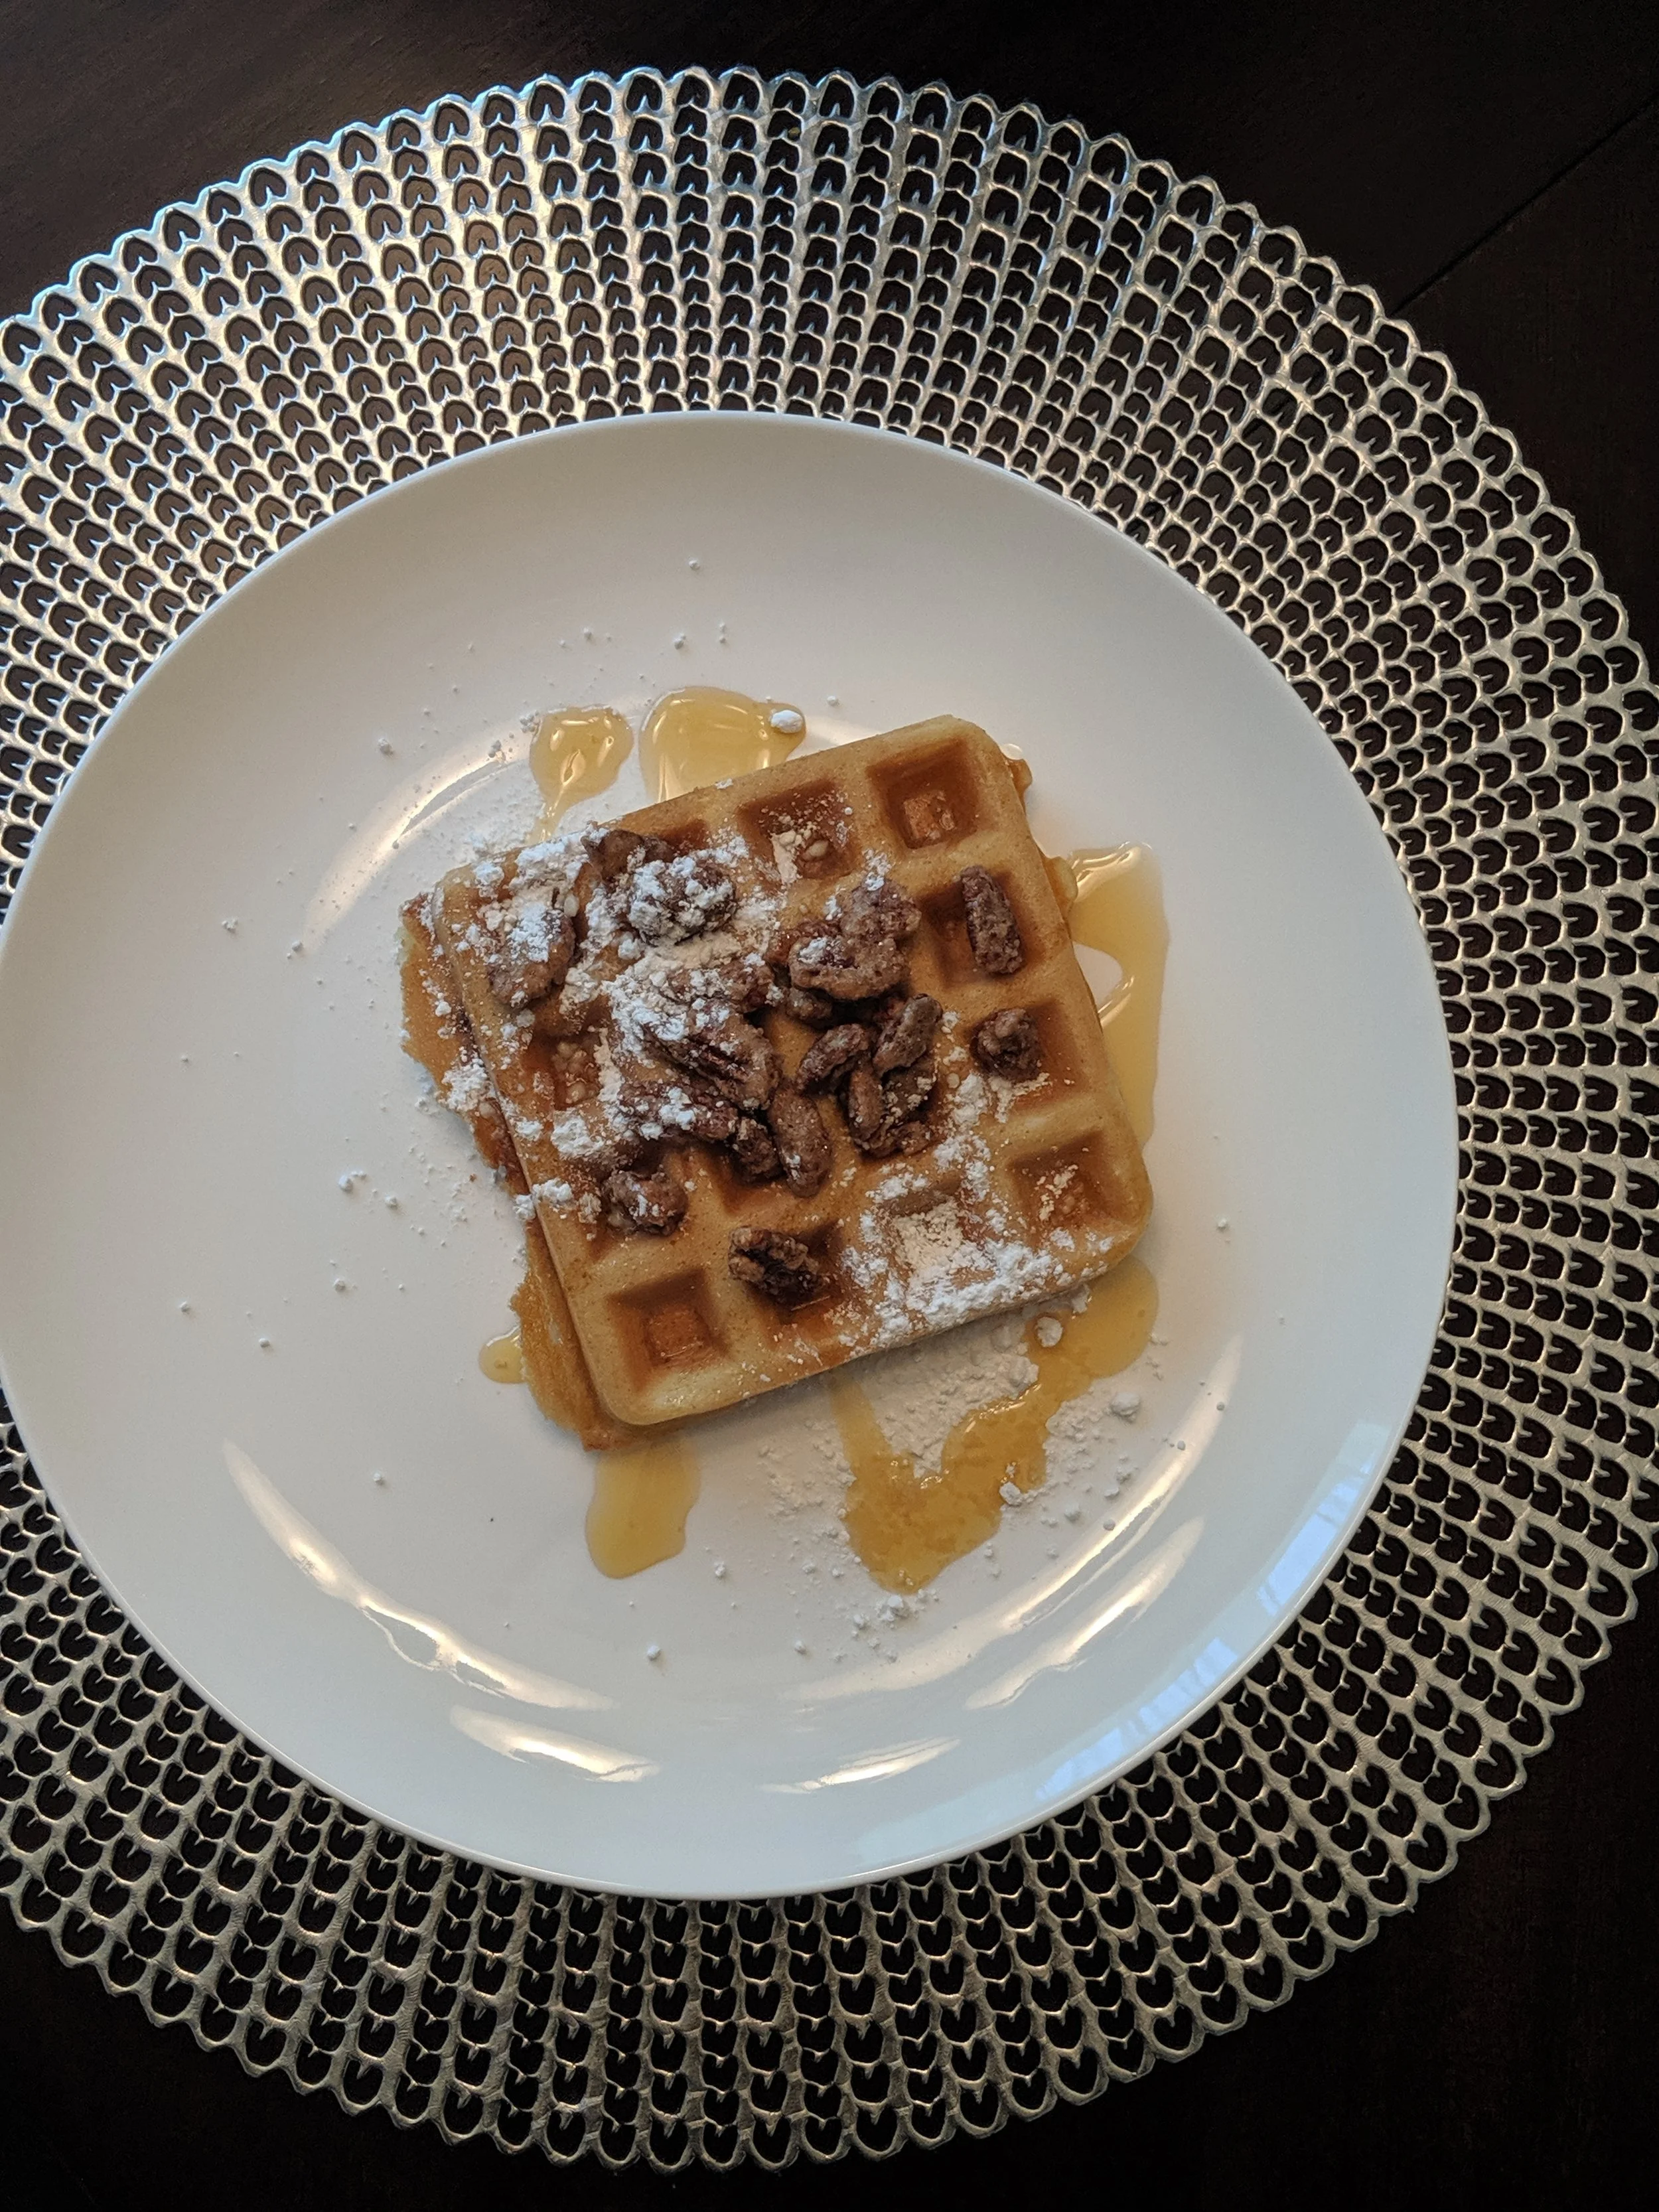
Step 4: Remove waffles from iron when they are ready, then plate the waffles. Once the waffles are plated, top them with candied pecans, bacon bits (optional), powdered sugar, and maple syrup. Enjoy!

Candied pecan + hickory smoked bacon bits on two waffles.

Candied pecan + hickory smoked bacon bits on two waffles.

XO, Analise

Recipe: Beer Battered Shrimp & Spicy Garlic Dipping Sauce

“The smell of shrimp is comforting.” - Lennon Parham

Growing up in the south, fried shrimp has always had a special place in my heart. I absolutely love shrimp any type of way - fried, steamed, or grilled. Frozen shrimp is something that I always keep on hand in my house, and enjoy pairing it with many dishes.

Recently, we had a get together at our home, and were left quite a few cans of beer, so my husband and I had a grand idea to make beer battered fried shrimp.

After much research, I finally came up with the most delicious, perfect, and quick recipe. Today, I’m sharing my simple recipe for beer battered fried shrimp, and a spicy garlic dipping sauce!

Golden fried beer battered shrimp.

Golden fried beer battered shrimp.

What You’ll Need:

The Sauce

  • 1 large jalapeno

  • 1 cup of mayonnaise

  • 1 tablespoon of lemon juice

  • 4 peeled cloves of garlic

  • 1 teaspoon of red wine vinegar

  • 1 teaspoon of apple cider vinegar

  • 1 teaspoon of cracked black peppercorn

  • A pinch of sea salt

Step 1: Combine all of your ingredients into a food processor, and puree all of the items until the sauce is creamy and smooth.

Pro Tip: If you like a lot of heat, add chilli pepper flakes or another jalapeno to the sauce! If spice is not your thing, then swap out the jalapeno in in exchange for a few more garlic cloves!

The Shrimp:

  • 1 pound of large shrimp

  • 1/2 cup of flour

  • 1/2 cup of beer

  • 1 teaspoon of Old Bay seasoning

  • 1 teaspoon of Lemon Pepper seasoning

  • A pinch of sea salt

  • 1/2 teaspoon of cracked black peppercorn

  • Cooking oil of your choice - Canola, Peanut, or Vegetable

Step 1: Ensure your shrimp is thawed out if it is frozen, rinse them, and begin to line up each piece of shrimp on a stack of paper towels. You’ll want to drain any excess water out of the shrimp before dipping them into the batter and frying.

Pro Tip: The batter will not stick to wet shrimp, so make sure they are very dry.

Step 2: While your shrimp is drying, begin to make your batter. Combine your flour and beer, and ensure it is a nice creamy texture - similar to pancake batter! Once the batter is nice and smooth, combine all seasonings: Old Bay, Lemon Pepper, salt, and pepper and stir to ensure they are distributed evenly throughout.

Pro Tip: If your batter is a little too thick, and a little bit more beer to batter to ensure it isn’t clumpy.

Step 3: Get your oil nice and hot! While you are waiting, begin to dip each shrimp into the batter, not going past the tail, and begin placing them into the pan/pot. It will take about 3-5 minutes for the shrimp to get nice and brown - keep your eye on them while they fry.

Pro Tip: Do not overcrowd the vessel, as the shrimp will not cook evenly, and the battered shrimp will stick together.

Step 4: As the shrimp are reaching their golden brown color, remove them from the oil, and place them on a stack of paper towels so they can drain any excess oil.

Step 5: Serve and enjoy!

Beer battered shrimp + spicy garlic dipping sauce.

Beer battered shrimp + spicy garlic dipping sauce.

XO, Analise

Dining Out: Norfolk, VA - Codex + La Brioche

“We all eat, and it would be a sad waste of opportunity to eat badly.” - Anna Thomas

Whenever I am able to try a local spot, it makes me so happy. Downtown Norfolk is literally bursting at the seams with amazing and quality restaurants. Many are tucked away in the historical Ghent area or easily accessible within the Neon District and on Granby Street! No matter where you turn you are bound to luck up on some place super special. Not only is the food super delicious, but the people make the experience that much better. Being able to connect with local business owners, and trying their food really make dining out that much cooler.

Today, I’m sharing two new spots that I’ve recently lucked up on - La Brioche and Codex. Their food and unique atmosphere really are worth trying out!

La Brioche

Rating: 5/5

One of my dear friends has raved about La Brioche - and I totally value her opinion, because she is from France! La Brioche is a French-style bakery, and their food is so fresh and authentic. Everything is made fresh daily and in-house - once an item is sold, it’s gone until the next day. From pastries to gourmet sandwiches, everything is super delicious and absolutely yummy. The ingredients are high quality, and you can taste it in each bite.

The entry to La Brioche, in the Neon District.

The entry to La Brioche, in the Neon District.

The staff was so sweet, and really went out of their way to review their menu. They were kind and ensured throughout our visit that we had everything we could possibly want. La Brioche, is perfect to visit at anytime throughout the day - from a breakfast stop to a afternoon snack, they have so many options. I do recommend visiting first thing in the morning if you want an excellent selection though - their items go fast!

Chocolate Chip pastry, Apple Tart, and Almond Croissant.

Chocolate Chip pastry, Apple Tart, and Almond Croissant.

Codex

Rating: 4/5

Remember when I went to visit Pendulum Fine Meats & Market last month? Well, Codex is located right in that same space! By day this location is Pendulum, and by night Codex comes in and flips the restaurant into a Modern American dinner spot. Codex makes the restaurant slightly different by switching up the ambiance and adding additional seating. This place gets packed super quickly - so I most certainly recommend making a reservation - otherwise you’ll be waiting for awhile for table.

Entrance into Codex + lovely artwork showcasing the restaurant logo.

Entrance into Codex + lovely artwork showcasing the restaurant logo.

I was so pleased with the staff, and how kind they were during our meal. Our waitress even let us try a few wines before we selected the perfect pair for our meals! For my dinner, I ended up choosing the Sockeye Salmon entree. It was really delicious, and paired with the light salad, was the perfect summer dish. The experience was pretty neat, to see one of our favorite lunch spots transitioned to a high-end dinner spot was pretty cool. There was a slight drawback, it was pretty cramped in the restaurant to accommodate for extra seating, but my husband and I were glad we tried it out!

Sockeye Salmon + Heirloom Tomato and Cucumber Panzanella Salad

Sockeye Salmon + Heirloom Tomato and Cucumber Panzanella Salad

I can’t wait to try more local spots in the near future. It’s always a blast being able to try new experiences, and sharing them with loved ones.

XO, Analise

Dining Out: Cookology

“Cooking is about passion, so it may look slightly temperamental in a way that it's too assertive to the naked eye.” - Gordon Ramsay

When my bestie Alisha, decided to have her 29th birthday at Cookology in Northern Virginia, I was super thrilled. She wanted to host an intimate cooking class with close friends and family, on her special day. The class was so much fun, and the instructor was amazing! I loved the fact that we were taught specific cooking techniques, but we were free to experiment, and try new things with our dishes. Everything throughout the night was casual, fun, and light - if you are in the Northern Virginia area I totally recommend this for adults, and children.

The Menu:

Appetizer: Salad with Lemon Vinaigrette

Entrée: Parisian Bistro Style Chicken with Roasted Red Pepper Veloute

Dessert: Bourbon Bread Pudding

Truer words have never been written.

Truer words have never been written.

When we arrived to the cooking class, we were greeted by the most welcoming staff, wine, and appetizers! We got acquainted with our work stations, the recipes we’d be creating our meals with, and the kitchen.

The welcoming appetizer of caprese skewers, before we began cooking.

The welcoming appetizer of caprese skewers, before we began cooking.

We cooked with a variety of vegetables, proteins, and even alcohol! Our instructor had us begin with our individual dessert first. The class needed adequate time to prep the bourbon bread pudding first, prior to making our entree. By doing this process, we were able to allow the dessert to cook thoroughly, and this also eased everyone into making the larger dish ahead.

Bourbon, celery, peppers, and butter - all key components for the meals cooked during class.

Bourbon, celery, peppers, and butter - all key components for the meals cooked during class.

The ingredients for the bourbon bread pudding.

The ingredients for the bourbon bread pudding.

Preparing the bourbon bread pudding mixture, and cubing the bread for the dessert.

Preparing the bourbon bread pudding mixture, and cubing the bread for the dessert.

Once the dessert was assembled, and set for baking, everyone moved on the entree. We made a Parisian style chicken with a house made sauce. For this dish we were assigned a partner, and Alisha was mine! As a team, we prepared all the veggies to go along with the dish - celery, onion, potatoes, garlic, and red pepper. From there she sautéed the mixture into a large pot, which was later blended in a food processor, as a sauce for the grilled chicken.

My best friend, Alisha sautéing the veggies for the roasted red pepper veloute.

My best friend, Alisha sautéing the veggies for the roasted red pepper veloute.

The class observing a cooking demo by the head chef.

The class observing a cooking demo by the head chef.

Parisian style chicken, paired with a house made salad.

Parisian style chicken, paired with a house made salad.

Bourbon bread pudding, with a whiskey glaze.

Bourbon bread pudding, with a whiskey glaze.

I absolutely loved my experience at Cookology! This experience was really unique to other cooking classes. Not only was the class private, but it was super relaxed, and I enjoyed the fact that everything was easy going. The chef provided really good kitchen tips throughout the process. Also, it was great to learn new recipes as well as how to stretch ingredients for each meal. I definitely recommend doing a cooking class with friends, or your partner. It is a great bonding experience, plus you walk away with so much knowledge!

If you have taken a cooking class, share your experience below!

XO, Analise